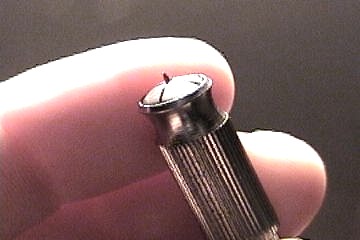
I've also used the pin vise with tiny drill bits. See here. Holes created in this way are much cleaner, and lack the dimpling effect of needle-punched holes.
The first step is to create a top and a bottom using typical methods. See the excellent instructions that first got me interested in these things (many thanks to Scott Henderson). You can use any soda can, the smaller Mott apple juice cans or (smaller still) the V8 or apricot nectar cans.
Note, however, the way the top can is cut, and the way the holes are placed. This stove has a smaller flame circle, because the holes are punched on the convex surface of the top can. Also, the two cans are cut taller than need be. Be sure the convex dome of the top can is beneath its outer edges. Material may be trimmed off when the stove is fully assembled.
Note that I've added fiberglass insulation, and a piece of fabric window screen. It's not tightly packed.


Use a marker and create a line around the inside (or outside) of the rim of the stove, where you want to trim excess material. You better leave at least 1/8" of vertical wall, though. I'd suggest nearly 1/4"
Trim along your line with a scissors, being careful not to warp the can or stretch the aluminum where the top can is concentric within the bottom one.
To fill your stove, spill a little alcohol in the top, or even around the bottom of the can (perhaps with the stove sitting atop an inverted pot or pan). Get it a wee bit toasty, which happens fast with aluminum. Blow out the flames entirely, and pour your alcohol into the top of the stove. The cooling air within will suck the fuel through your pinholes, into the stove. You can also gently flex the sides of the stove to vent bubbles/suck in fuel. [This filling process is the one thing I'm not entirely content with for this model.]
At any rate, once you've filled the stove, you'll have enough fuel left in the top section to preheat the thing. You could spill a little fuel down the outside to speed things up, if you have a surface that's reasonable for that.
Note: Just for fun, I placed the stove on an ice block while it was running, and it immediately went out. Instantly. So don't count on this thing unless you have a way of insulating it from cold surfaces underneath.
Note in the stove at left (a Coke can), the flame is a bit far from the edge of the can for efficient transmission of heat to aid in vaporization of the fuel. I heartily recommend the Mott apple juice cans, which are smaller but not as small as V8.


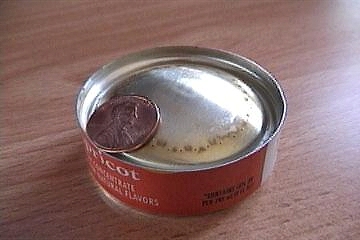
Addendum: Below is a picture of this same approach, using a V8 style can (apricot nectar). The holes in this unit were drilled using a pin vise with a .0135" #80 bit (a good hobby store will have these). This is much smaller than pinholes. It works very well; I think I'm done forever with the pin method.

 < "Cool site
of the year" award, IMO